Planting for Winter Beauty: Creating a Garden with Year-Round Appeal

A well-planned winter garden is a testament to nature’s ability to captivate in all seasons. While spring and summer bring bursts of blooms and fall dazzles with fiery foliage, winter offers an often-overlooked opportunity to showcase structure, texture, and color. By selecting plants that thrive or remain visually striking during the colder months, you can transform your yard into a serene and vibrant retreat, even when the world outside seems dormant.

Whether it’s the fiery red stems of Red Osier Dogwood, the textured elegance of Paperbark Maple, or the unexpected blooms of Hellebores, the winter landscape can surprise and delight. Thoughtful planting ensures your garden feels alive all year round.

Disclaimer: Plant Hardiness Zones Matter

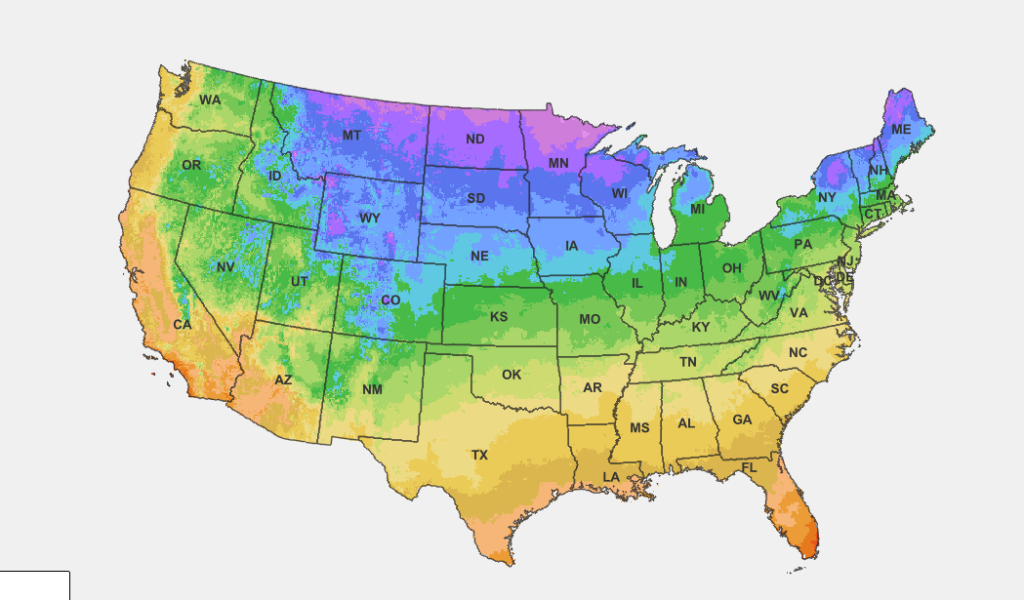
Not all plants are suited for every climate. Before selecting plants, ensure they are appropriate for your USDA hardiness zone. Choosing plants that match your zone increases their likelihood of thriving through the seasons. To find your USDA plant hardiness zone, visit the USDA Plant Hardiness Zone Map.

1. Red Osier Dogwood

  • Latin Name: Cornus sericea
  • Hardiness Zone: 2–8
  • Why It Works: Renowned for its vibrant red stems that stand out against snow, Red Osier Dogwood adds much-needed color to winter landscapes.
  • Design Tip: Plant in clusters for maximum visual impact or mix with evergreens to create a dynamic contrast.

Red Osier Dogwood with vibrant red stems in snow

2. Paperbark Maple

  • Latin Name: Acer griseum
  • Hardiness Zone: 4–8
  • Why It Works: The Paperbark Maple’s cinnamon-colored, peeling bark provides striking texture and warm tones in winter.
  • Design Tip: Pair with low-growing evergreens to highlight the tree’s intricate bark.

Paperbark Maple with cinnamon-colored, peeling bark

3. Hellebores

  • Latin Name: Helleborus niger
  • Hardiness Zone: 3–8
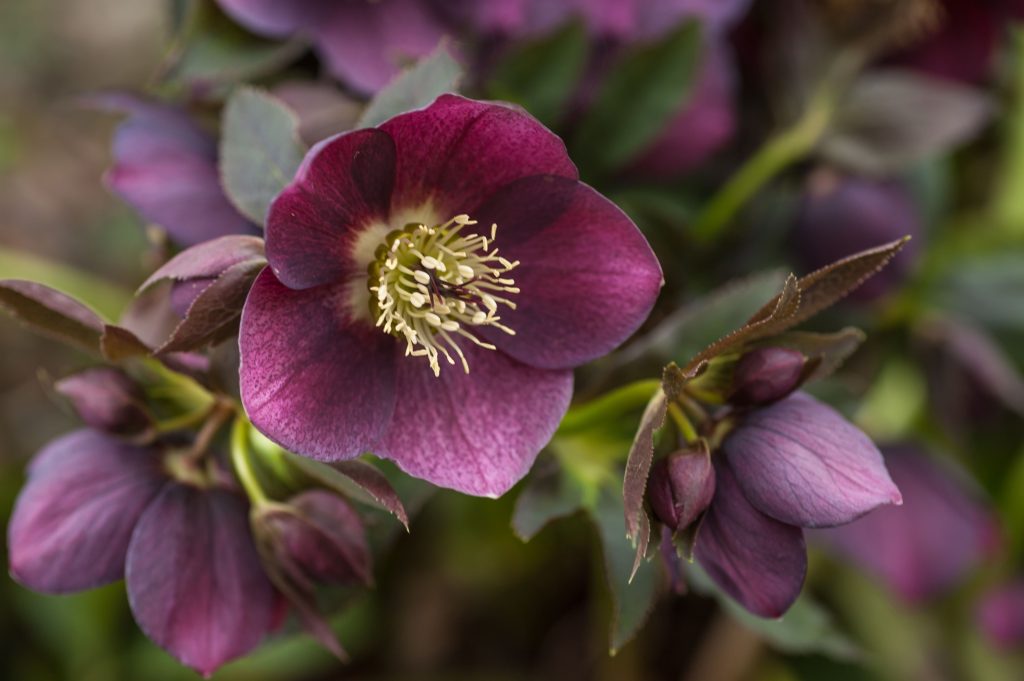
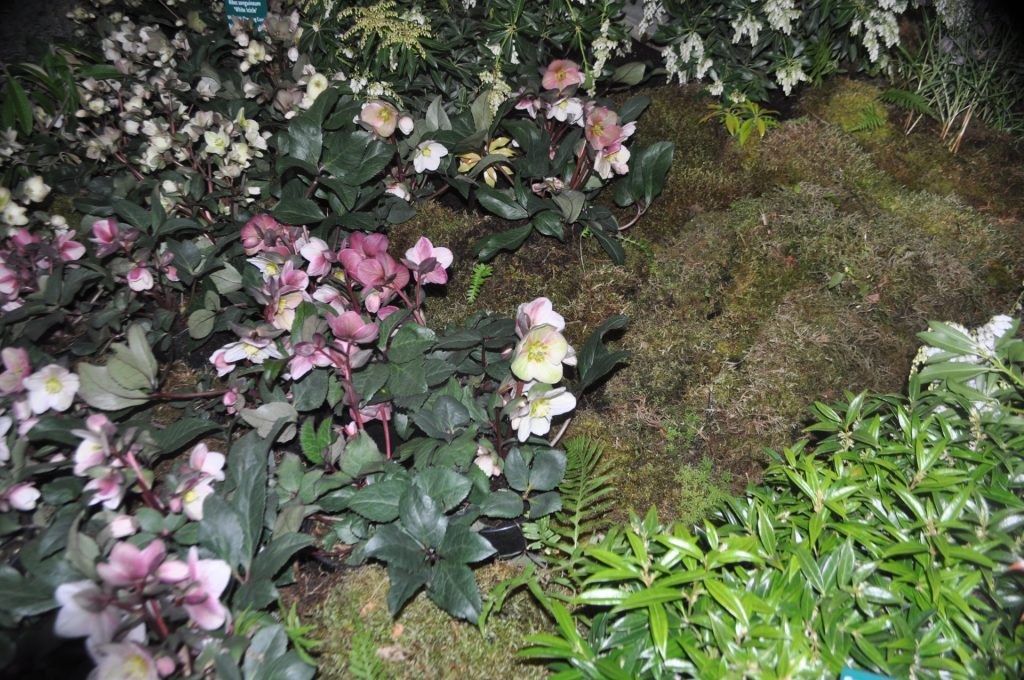
  • Why It Works: One of the few plants that bloom in the dead of winter, Hellebores offer delicate flowers in shades of white, pink, and deep purple.
  • Care Tip: Plant near pathways or entryways to enjoy their beauty up close during chilly days.

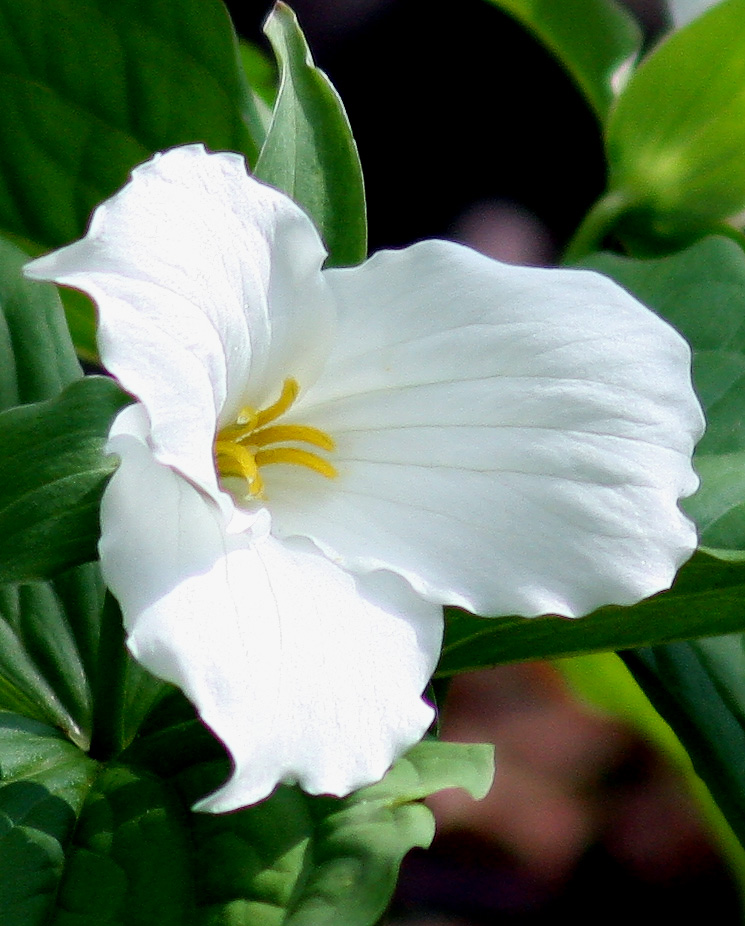
Helleborus niger with delicate white blooms

4. Japanese Camellia

  • Latin Name: Camellia japonica
  • Hardiness Zone: 7–9
  • Why It Works: The Japanese Camellia provides subtle elegance to any winter garden with its glossy green leaves and vibrant winter flowers.
  • Design Tip: Choose flower colors that complement your garden’s palette, from classic white to soft pink or bold red.

Japanese Camellia with vibrant pink flowers

5. Holly: A Love-It-or-Hate-It Option

  • Latin Name: Ilex spp.
  • Hardiness Zone: Varies, often 5–9
  • Why It Works: Holly’s glossy green leaves and bright red berries make it a classic choice for winter gardens, particularly in festive landscapes.
  • The Downside: As a landscape professional, I’ll admit I’m not a fan. Holly often looks better in photos than in real life and can be a maintenance headache. The sharp leaves and tendency to look untidy over time make it less appealing in practical use.

Holly with bright red berries and glossy green leaves

6. Perennials and Winter Planning

  • Examples: Purple Coneflower (Echinacea purpurea), Milkweed (Asclepias tuberosa)
  • Hardiness Zone: Most perennials vary; these examples thrive in zones 4–9.
  • Why It Works: Perennials like Purple Coneflower offer winter interest with seed heads that attract birds and provide texture.
  • Care Tip: Most perennials should be cut back in late autumn to avoid becoming mushy in the snow, but leaving seed heads intact can add visual interest and support wildlife.

Purple Coneflower seed heads adding winter interest

7. Plan for Year-Round Beauty

Winter gardens shouldn’t be a “yard of sticks.” While many people favor deciduous trees for their seasonal transformations, it’s essential to balance them with evergreens to maintain structure and color during winter.

  • Design Tip: Incorporate a mix of evergreens and deciduous plants to create a garden that looks alive year-round.
  • Blue-toned evergreens like Blue Spruce (Picea pungens, Zone 3–7) add a cool contrast, while shrubs like Boxwood (Buxus sempervirens, Zone 5–9) provide tidy, reliable greenery.

Blue Spruce adding cool contrast to winter gardens

With the right choices, your winter garden can be as enchanting as any other season. By focusing on plants with visual interest like Red Osier Dogwood, Paperbark Maple, and Hellebores, and carefully balancing evergreens and deciduous trees, you’ll create a space that feels alive year-round. Don’t forget to consider your climate and hardiness zone for the best results, and enjoy the unique beauty that winter plants bring to your garden.

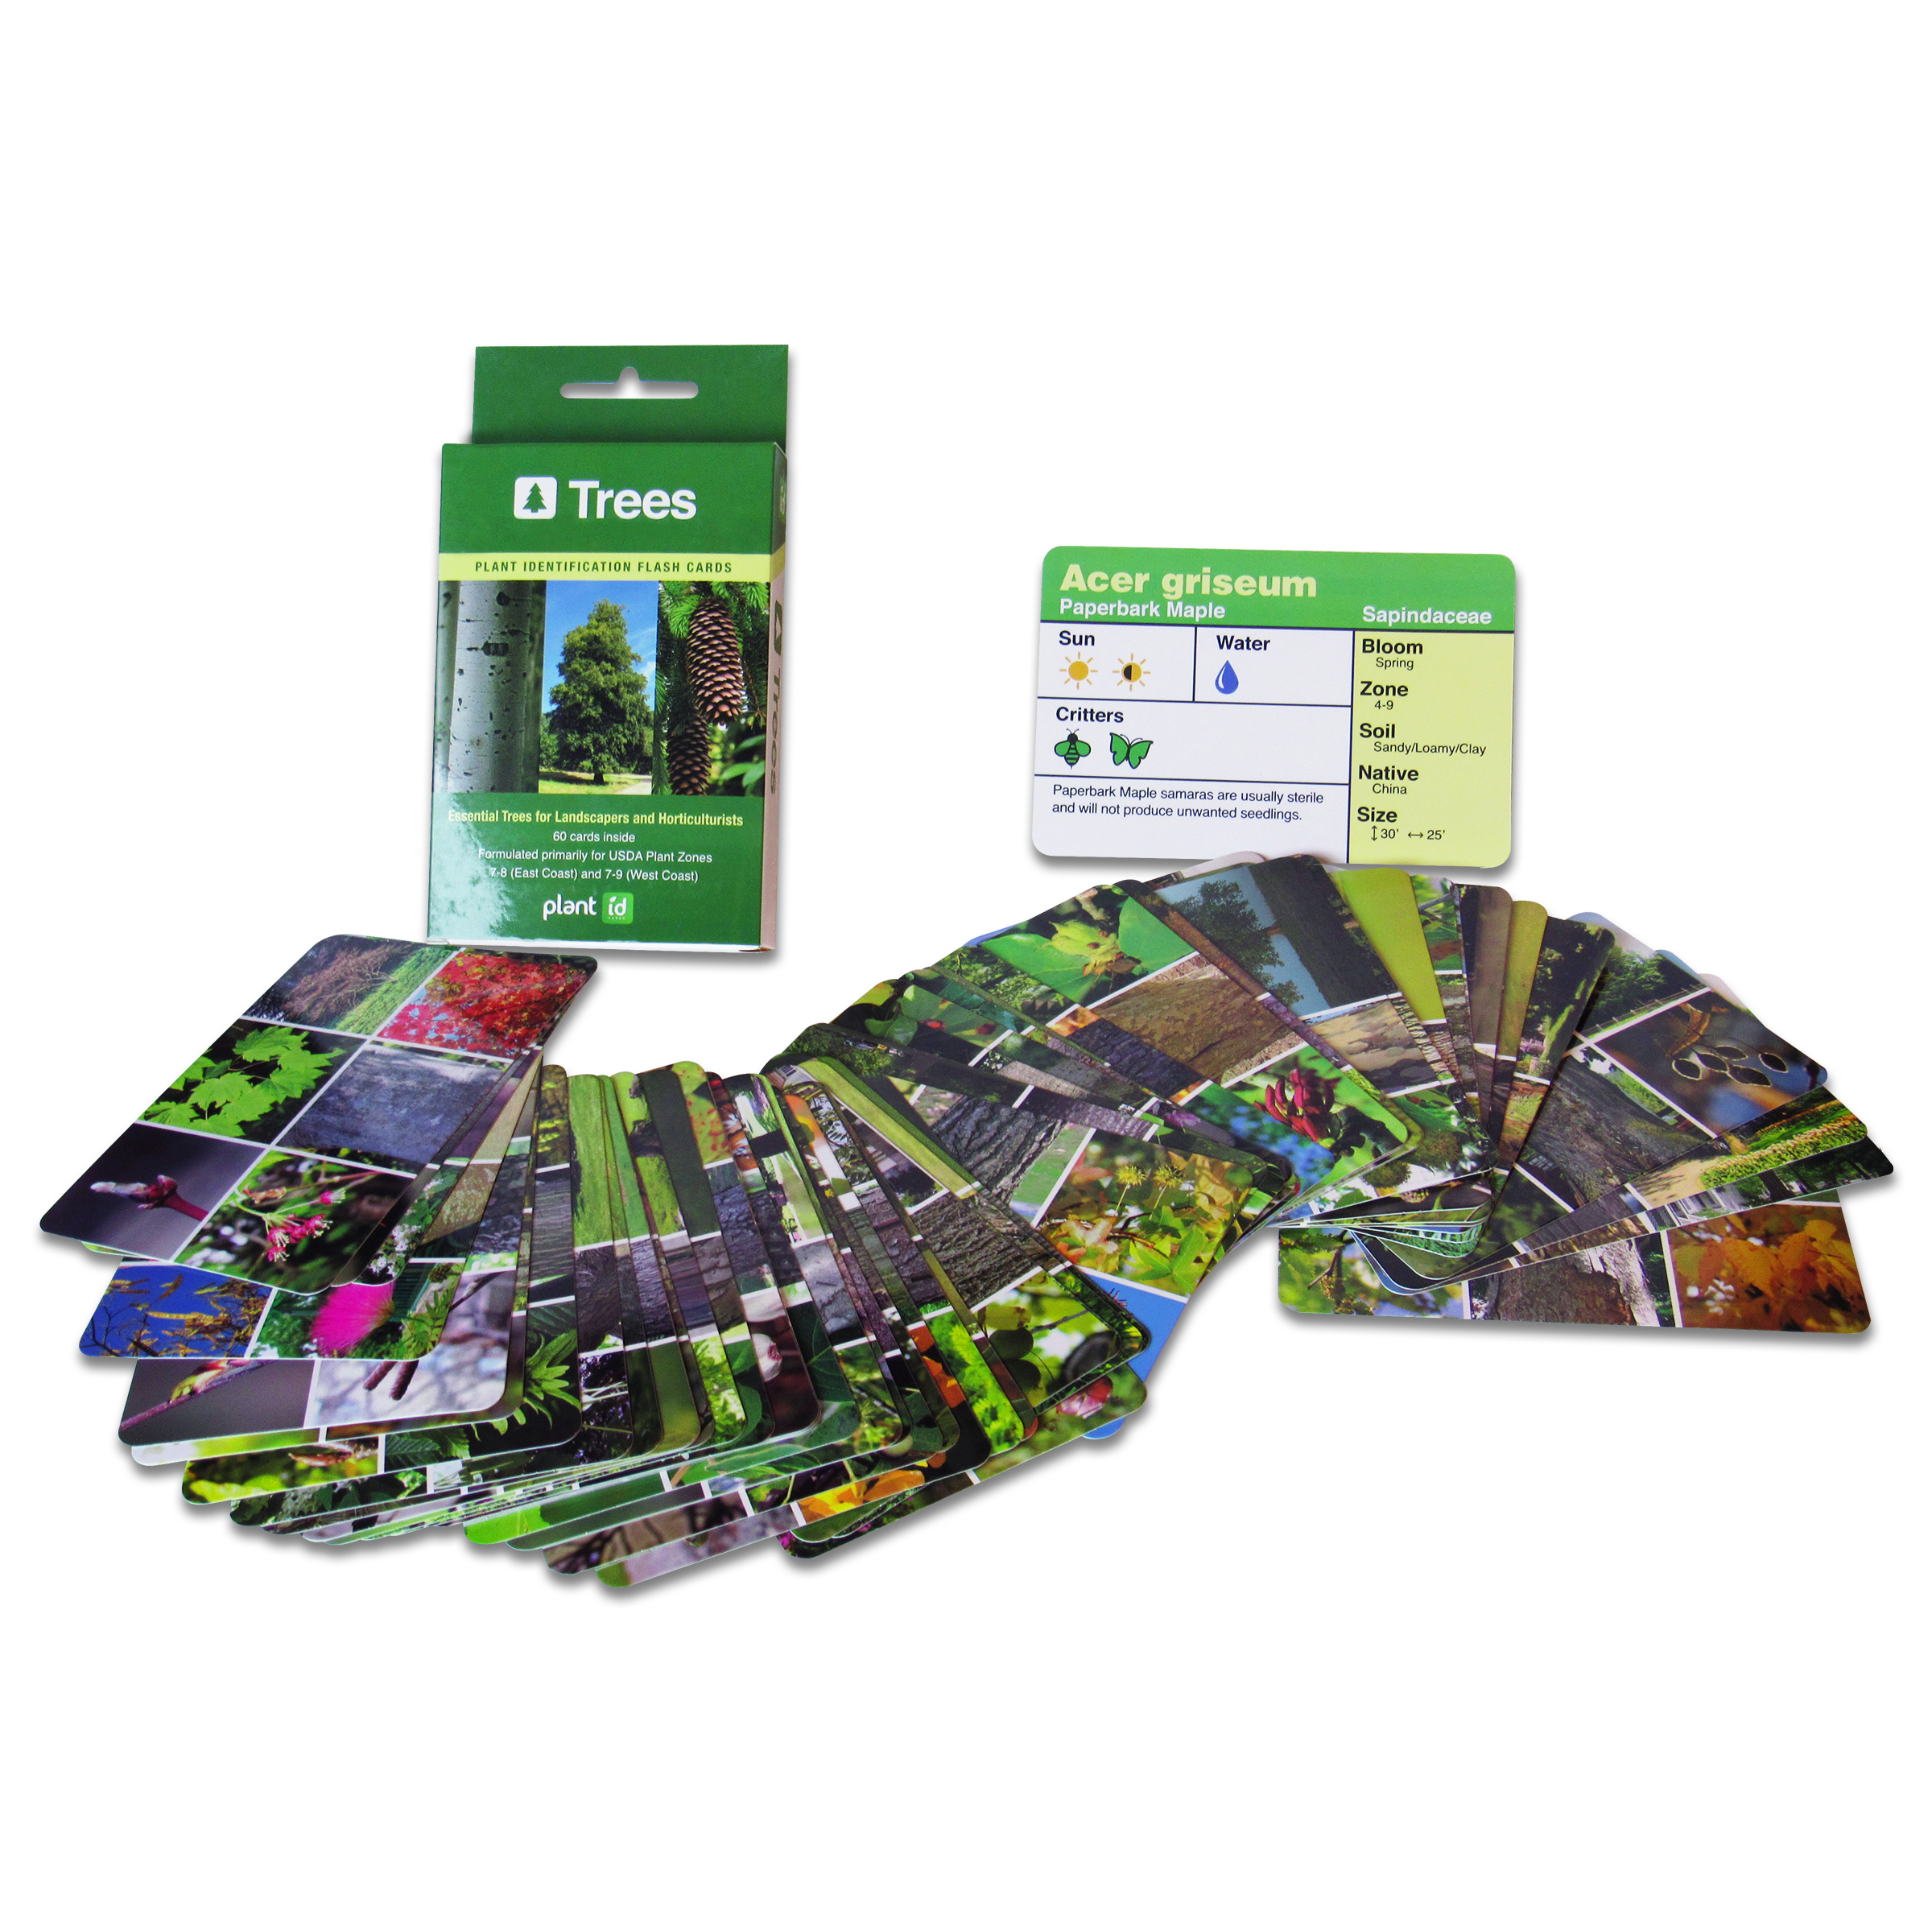
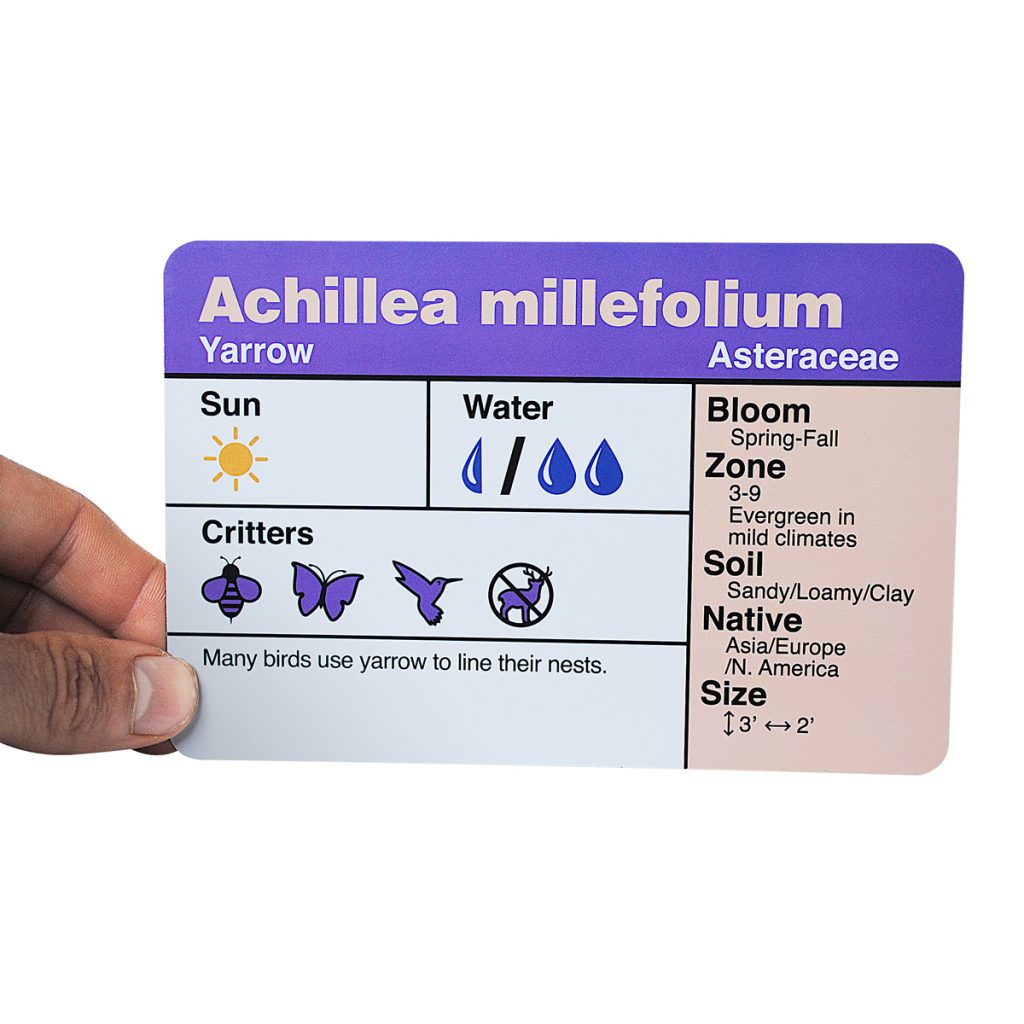
Explore more: Learn about these plants and others with our Plant ID Cards.

9 Lucky Plants for 2025

Lucky Plants

How time flies! It’s hard to believe it’s already 2022. We’ve all been in this pandemic bubble for the past two years and we’re all hoping that this year will be kinder to us than last year.

We may need more luck than ever as COVID-19 continues to evolve. So let’s attract positivity and good vibes in the new year by adopting plants that can bring luck to our home. You may even have some of these plants in your garden already! Here are some of the luckiest plants for the year 2022 (Year of the Water Tiger):

1. Rubber Tree

Part of the fig family, rubber plants have round, shiny green leaves that symbolize wealth and abundance. Rubber trees thrive in medium to indirect light, make great indoor plants and also promote good feng shui because they purify the air and remove negative energy from a room. Feng Shui experts say that the best place to put a rubber tree is in the southeast part of your living room.

2. Money Tree

Just like the rubber tree, the money tree plant draws prosperity and fortune to a home. Money trees are grown in a variety of different ways. Some come in braided trunks with lush green leaves. There are some with large trunks and variegated leaves and others are grown in smaller pots so they can stay mini money trees (bonsai). Although money trees are grown outdoors, they can also thrive in low light areas so you can keep them indoors too. The money tree is a nice hassle-free plant for beginner plant parents.

3. Eucalyptus

Eucalyptus is known for its fresh minty scent, and symbolizes cleansing and new beginnings. Its fragrance is reminiscent of a day spa where we used to relax and enjoy the wonders of soothing massage treatments. It’s great to have this plant around as it alleviates stress and also reminds us to stay calm during the pandemic.

4. Snake Plant

Also known as Sanseveria, the snake plant is believed to be lucky because it symbolizes cleanliness and purity. It absorbs all toxins in the air and removes bad energy from a room. It’s also believed to become luckier when it starts to bear flowers. It’s sometimes called the “Mother-in-Law plant” because the leaves are shaped like a sword, or like the sharp tongue of a mother-in-law!

5. Jade Plant

Popular because of its coin-shaped leaves, the jade plant is associated with money and wealth. Since it’s a type of succulent, it is an easy-to-care-for plant. It doesn’t require frequent watering and can grow under low light conditions.

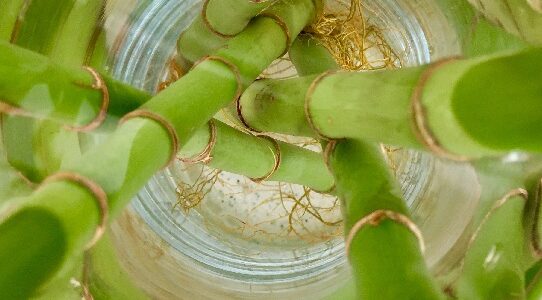
6. Lucky Bamboo

Who could forget about lucky bamboo? Often given as a gift, lucky bamboo symbolizes long life, wealth, success and prosperity. Feng Shui experts say that the luck and blessings associated with this plant are based on the number of stalks in the arrangement. It can be put in a pot with soil or also in a beautiful vase with clear water.

7. Peace Lily

Characterized by big green leaves and pure white flowers, the peace lily is considered lucky and is very pleasing to the eyes. It is said to convert all bad energy in a room to good energy. It a natural air purifier so it’s perfect for homes, offices and business spaces.

8. Njoy Pothos

Njoy pothos is a “trailing plant” with dual-colored leaves (white and green). The white leaves of the njoy pothos symbolize peace and harmony while the green leaves represent luck, money and abundance. Their vines grow long and fast, which symbolizes perseverance and determination in chasing life goals and dreams.

9. Citrus Trees

A surefire way of attracting luck and good fortune to your home is by growing a citrus tree. These shrub-like plants can be grown both outdoors and indoors and are believed to bring wealth and prosperity to a home. You can choose orange, lemon or lime – or one of each to maximize your luck!

All of the plants on our list are known for attracting luck and good vibes wherever they grow. Let’s surround ourselves with plant positivity this year so we can combat all the negative things that have been happening since the pandemic began.

With right thinking, a great outlook on life, and a a few lucky plants, 2022 will be so much better than 2021. Happy New Year everyone and stay safe!

-Mel

Why Gardening During this Pandemic is Good for You

green grass

With the COVID-19 outbreak upon us, it is important to keep our minds and bodies healthy. If you don’t already enjoy gardening, you may be surprised to know that it does wonders for your well-being. Here are 6 reasons why gardening is good for you.

1. POSITIVE IMPACT ON MENTAL HEALTH

Gardening can help relieve stress and reduce symptoms of depression and anxiety since it keeps you busy and focused on a project. Having something to look forward to like new sprouts, blooming flowers or even an unfurling leaf can lift your spirits. Gardening will help you take mind off things and help you focus on a goal. I once read that some hospitals even use gardening as an activity for rehabilitating people who have undergone surgeries, injuries, addiction and other medical conditions. Gardening is a natural therapy that is good for your mind and soul.

2. HELPS YOU EAT HEALTHIER

Growing your own food in the comfort of your own home also helps you to eat healthier. You’re getting fresh produce that is more nutritious with no trace (or lower detectable levels) of pesticide. You’ll have peace of mind just knowing that what you’re eating is safe and good for your body.

3. GIVES YOU A BOOST OF VITAMIN D

Exposure to sunlight while gardening increases your dose of Vitamin D as well as your Calcium level. These vitamins benefit your whole immune system and will keep your bones healthy and strong. Just remember to do your gardening in the early morning or late afternoon so it’s not too hot and you get the right amount of Vitamin D. Don’t forget to use sunscreen to protect your skin from sunburns!

4. RESTORES YOUR CONFIDENCE AND EDUCATES YOU

Whether it’s a new or an old hobby for you, there’s always a new skill to be learned learned from gardening to help build your self-esteem and restore your confidence. Gardening is a continuous process and it’s very rewarding because it teaches you valuable life skills such as a sense of responsibility, discipline, love of nature and a better understanding of how everything works in our environment.

5. PROTECTS YOUR MEMORY AND REDUCES RISK OF DEMENTIA

Engaging yourself in physical activities such as gardening can prevent dementia. It stimulates your brain and creates a sensory experience that contributes to your well-being. There were studies that proved gardening daily reduces dementia risk factors by 36%.

6. A GREAT FORM OF EXERCISE

Gardening is a great form of exercise. You may notice that you’re breaking a sweat just by doing simple garden activities such digging a hole, harvesting fruit or pulling out weeds. Gardening is considered a good workout because it allows you to stretch all your muscles and requires movement not just from your hands and arms but including your legs, back and neck. It’s a full body exercise.

In Conclusion

We do not know how long this pandemic will last, but pandemic or no pandemic — we should learn how to take care of ourselves and always think of our well-being. This lockdown has given us more time and opportunities to learn new things and set new goals for ourselves. So, if you want to keep both your mind and body in perfect shape, grab your gardening tools and start digging!

How to Grow Your Own Vegetable Garden

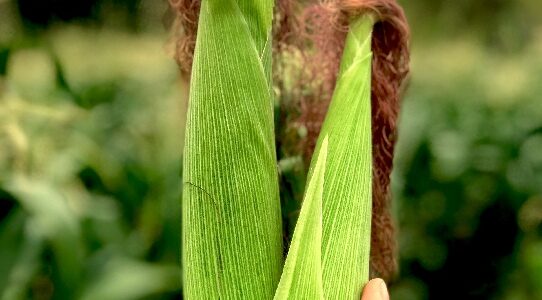
ears of corn

As I was doing some grocery shopping last weekend, I passed by the fruits and vegetables corner and I realized — wouldn’t it be nice to have my own vegetable garden in my backyard? Wouldn’t it be cool to know that if I want to make a salad or a simple power juice, I could always rely on my stash that I could harvest anytime I want to? But how do I start?
If you’re asking the same questions, then please feel free to join me on this journey. I’ve gathered some information on how to grow your own vegetables at home.


As we all know, springtime is the growing season and this is the perfect time to create a vegetable garden in the comfort of your home. In addition to the benefits of gardening as an activity, you can also enjoy healthy and nutritious food that you know is 100% organic and safe.
These are some of the major points to consider before taking on this amazing project.

Finding the Right Location

One of the golden rules of gardening is to find the perfect location for your plants. Since we’re talking about vegetables, these are a lot different from ornamental plants and need extra care and extra space. It is essential that you give your vegetables the best spot so that they have room to grow and can produce the best veggies for your home.

May it be your backyard, front yard or even indoors, ensure that the location has ample amounts of sunlight, humidity and a water supply. As much as possible, stay away from areas that are windy as the wind can knock over some plants, especially those that are leafy or have very soft and fragile stems.

Choosing the Right Vegetables

You can start by brainstorming the vegetables that you really love to eat and often use in the kitchen. If you choose to start with seeds, take time to check out the back part of the pouch where general information about that vegetable is listed like plant characteristics, the plant hardiness zone it belongs to and daily care.


If you’re planning to buy readily available vegetable seedlings from nurseries and garden centers, please check out the foliage and look at the roots first. You want to make sure that you’re buying a healthy one with no signs of root rot. Choose and inspect closely because some seedlings have multi-plant cells, which means it has more than one seedling per cell. You’ll get to bring home more seedlings for the price of one!

Also take into consideration if it’s a climbing type of vegetable like squash, cucumbers and beans. You might need to prepare a plant support for the climbing vine such as a trellis or a cage. Be ready to make a vertical garden to maximize those trailing veggies!

Preparing the Soil

For your vegetables to thrive and grow healthy, you need to prepare the right garden soil. From what I have gathered, the best soil suitable for veggies includes a mix of compost and organic matter. It can be kitchen scraps, composted shredded leaves or aged bark. I’ve also seen videos that they mix coffee grounds with the soil before planting. Some go as far as using water-based sardines or fresh fish before placing the plants as it is proven to help the vegetables grow faster and healthier.

Planting at the Right Time

As mentioned earlier, springtime is the growing season — so better start now while spring is in full swing. Go ahead and start planting the seeds/seedlings you bought. Just make sure that you give your plants enough space so there’s room for them to grow. Check and take note of the planting dates so you can monitor the progress of your vegetables. It would be great to document weekly changes by taking pictures and notes for future reference.

Using the Right Fertilizer

There are several fertilizers available on the market that you can use in your vegetable garden. It’s best to stick to organic fertilizers, or even better, you can make your own natural fertilizers at home. Check out my previous blog about homemade fertilizers for your garden that are very easy to make and cost-free.

Giving the Right Care

Gardening is a continuous process and you must be consistent in everything you do. Watering and fertilizing your veggies are part of this process and you need to do this religiously to make your garden a success. Give your plants extra love and proper care. Soon, you will see yourself harvesting the fruits of your labor.

In Conclusion

I guess that’s it. With this ongoing global pandemic, it’s just practical to grow your own food. It will lessen the number of times you have to go out to do grocery runs and it will also help you save money during this difficult time. As Ron Finley (famously known for his guerilla gardening) once said and I quote, “Growing your own food is like printing your own money.” So yeah, let’s start printing our own money now by vegetable gardening! ?

Gardening in Small Spaces on a Small Budget

Are you thinking about setting up a garden but have very limited space or a limited budget? Then this article is for you! Let me share some tips and tricks on how to create a garden even if money is tight and your space is small.

If you live in an apartment or a small house with a limited yard, you need to start by visualizing how to situate your plants so they don’t look too crowded. If indoor space is all you have, look for a “dead corner” inside your home that you don’t really utilize and transform it into something special.

If you’re outside and don’t really have much of a yard, then maybe you can come up with a spot for your plants on the stairs or near your door or window.

Check out inspiration on Pinterest boards to gather ideas and plan a certain look for your house and houseplants. Think of an arrangement that will be convenient for you when you start taking care of the plants that you’re bringing home. It’s nice to have a concept so that you know which direction you would like to go in with your gardening. You can even create a “theme” for each corner or spot. For example, place tropical plants near the window so you feel like you’re on a tropical island vacation whenever you look outside.

If money is tight, you can make use of things you have at home to serve as planters or containers for your plants. No need to buy special pots when you can recycle the stuff that’s been lying around your house. Here are some unique and creative ideas for plant containers:

1. Fish Tanks, Fish Bowls, or any Glassware

Why not make a Glass Garden? Re-use old fish bowls and fish tanks to make a cute terrarium that you can basically place anywhere without it taking up too much space. Glass gardens are ideal for those living in small spaces – they’re easy to set up, and very low-maintenance.

2. Milk Crates, Fruit / Vegetable Crates

These containers are great for growing herbs and vegetables. If you have several crates in your home, you can line them up and put different herbs in each crate or you can stack them up to make a vertical garden that can also serve as a unique provacy fence.

3. Wooden Pallets

You can create a raised bed garden using wooden pallets. You can also make a living accent wall by placing a wooden pallet in a wall, then incorporating hanging plants or herbs. Just make sure you select the right kind of wooden pallet because some of them are treated and can be very harmful to you and your plants.

4. Coffee Mugs (and other Ceramic Bowls)

Coffee mugs can also be used as planters and they are great for succulents and cacti. You can easily transfer a small plant into the cup (make sure that you drill a hole at the bottom for drainage), add a little bit of soil and fertilizer, then you’re done! Easy-peasy!

5. Gardening Tools

You can use old, dilapidated wagons, wheelbarrows and even watering cans as planters. Just like mugs, you would have to drill holes for proper drainage so you can prevent over-watering and root rot. Old gardening tools are perfect for flowering plants such as marigolds and daisies.

6. Metal Boxes and Metal Canisters

Time to review your toolboxes and rusty metal canisters and turn them into unique planters! If you don’t like the rustic feel then you can re-paint them for a pop of color. This can be an accent piece on your table or garden area.

7. Cinder Blocks and Concrete

Who would’ve thought that you can repurpose these as planters? They can be stacked just like Legos and are perfect for vertical gardening. Cinder blocks are unique because you can adjust for size depending on how you arrange them. They can easily fit in corners and other tight spaces. If you are looking into making a keyhole garden, cinder blocks are the way to go!

8. Baskets

I’m sure you are hiding some baskets around the house that you always thought you’d need to use again someday. The best baskets to use are thick and heavy-duty ones that are wide with a bit of depth to them, like laundry baskets and picnic baskets. As much as possible, stay away from baskets that are made from sea grass or any natural material because they might break down in time. Keep in mind that before using the basket as a planter, you should line it first (garbage bags or cloth works great) and put some holes in it for drainage.

To Sum Things Up:

To be honest, there are a lot of other things you can find in your home that you can use as a planter. The list goes on and on. You just need to think creatively and the possibilities are endless! As Cathy James said in her book The Garden Classroom:

“Your garden, no matter its size, is an outdoor classroom waiting to be explored.”

Start your exploration now! 🙂

-Mel

9 All-Natural Fertilizers for Your Garden

Don’t you just love seeing your plants flourish and thrive? If you’re someone who’s really into gardening, you know what a joy it is to witness your plants develop from a seedling (or a cutting, if you already started propagating) to fully grown plants — branching out, multiplying its leaves, starting to grow flowers for some and for others, beginning to bear fruit.


It means that you’re taking care of them correctly — watering them properly and giving them the right amount of light. But plants, just like us humans, need other nutrition to stay healthy and strong. Sometimes water and sunshine are not enough, and we need to give them some much-needed vitamins and minerals, also known as fertilizers.


Since I’m not really a fan of chemicals, I usually go for an organic method and use all-natural fertilizers for my garden. We can make use of simple items we have in our home and backyard to create them. Nothing compares to homemade products if you ask me!


Homemade fertilizers are easy to make, fun to create and best of all, they’re cost-free! So why spend money on synthetic or chemical fertilizers when you can whip up your own eco-friendly recipe which is as effective as the ones you buy from the store? No need to look or go very far. Let’s start saving time and money by trying out these simple fertilizer recipes for your garden!

1. Kitchen Scraps

What better way to start your own compost is there than by saving all your kitchen scraps! Compost is filled with essential nutrients for plant growth. It also improves the quality and structure of your soil so that it can hold the right amount of moisture, nutrients and air. So, while you’re prepping and cooking your meals, may it be breakfast, lunch or dinner — keep those non-meat food scraps in a plastic bucket with lid and let nature take its course. Or you can directly bury your scraps in your garden soil and let them compost underground.

2. Weeds or Grass Clippings

Check out those unwanted weeds and excess grass in your garden. It’s time we put them into good use! Weeds and grass clippings are great fertilizers as they are very high in nitrogen and they release water and nutrients back into your garden soil.

3. Coffee Grounds

Like weeds and grass clippings, coffee grounds are filled with nitrogen and they also help increase the acidity in your soil. Make use of your leftover coffee grounds by placing them into the soil at the base of your plants. It will surely perk them up, and keep them healthy!

4. Manure

This can come from horses, cows and chickens. Composted manure is best since raw manure can be highly acidic and may be harmful to some plants. If you don’t have any farm animals, there may be some people who are willing to give away composted manure for free. Composted manure has been used for centuries because it is filled with essential nutrients for your plants and improves soil’s water retention without putting your plants at risk.

5. Tree Leaves

Aside from having significant minerals, tree leaves also attract earthworms that help retain moisture in the soil. So next time you sweep up fallen leaves from your tree, try to collect and mix them into your potting soil. Crushed leaves can also be used as mulch to prevent weeds from building up in your garden.

6. Banana Peels

Bananas are a good source of potassium and potassium contributes significantly to your plant’s proper growth. Simply bury the peels under the soil and let them compost naturally. You will surely see more blooms for flowering plants and fruits on fruit-bearing trees/shrubs.

7. Eggshells

Who could forget eggshells as fertilizer for plants? Eggshells have been used widely on plants and are great replacement for lime. After breakfast, save those eggshells and crush them to put into the soil. Eggshells contains lots of calcium carbonate and prevents the roots of plants from rotting.

8. Fireplace Ash

Just like banana peels and eggshells, fireplace ash is also a good source of potassium and calcium carbonate. Before planting, amend your soil by adding fireplace ash.

9. Cat or Dog food

Got any pets who don’t finish their food? You can now recycle those leftovers by placing the dry dog or cat food on the garden bed, covering it with soil and then watering. Let the pet food decay naturally. Just make sure that the pet food is covered to keep your pets from digging it up and eating it! Pet food contains proteins and other micronutrients that can benefit the soil.

-Mel

Taking Care of Succulents: What You Need to Know

A lot of succulent arrangement ideas have been circulating online and they look very pretty planted in a pot, or a terrarium and even a fancy tray. But how do we maintain them and keep them as fresh looking as they are in the pictures you see on Instagram and Pinterest? Well, stick around! We’ll give you tips, do’s and don’ts and hopefully this article will help you your Insta-Worthy succulents flourish!

Let’s start this journey by using the following guiding questions:

1. Are you a beginner?

Is this your first time taking care of succulents? Although it’s not that really complicated to grow succulents, it’s still best to start with easy-to-care-for varieties if you are a first-timer. You need to decide if you want the indoor or the outdoor type of succulent so that you can prepare their spot accordingly, and of course, to understand their watering needs. If you’re choosing indoor succulents, you will most likely have to put them near a window with sheer curtains to avoid direct light. Or, place them somewhere far away enough from direct sunlight so they won’t dry out. Please do read the labels when picking out a succulent. The good news is that when you go for indoor succulents, you won’t be needing to water them often since they do not like retaining too much water or moisture. Sunlight is the best source to help your plants to thrive, retain their radiant colors and maintain their healthy leaves.

2. What are the easy-to-care-for varieties of succulents?

You can start off with succulents that are naturally green like Jade Plant or Aloe Vera. Haworthia (more commonly known as Zebra Cactus) and Gasteria are also excellent choices. If you like hanging plants, you can also try String of Bananas and String of Pearls.

3. Have you decided which container to use for your succulent arrangement?

Whether you pick out a cute ceramic pot or a durable plastic container, it’s important that you select the one that has a great drainage hole that will help your succulent breath when you water them. I know that you’re dying to put them in terrariums or glass containers just like the ones you see on social media. That’s great too, but it’s not the ideal container if you’re hoping to keep them looking fresh and vibrant. Pick out a container that has right amount of space for your succulents to grow and thrive. Good drainage and breathability are very important factors to maintain healthy succulent roots, stems and leaves.

4. What is the best type of soil to utilize when planting succulents?

We mentioned that good drainage and breathability are important when picking a container; this also applies to soil. Succulents do not like soggy or super dense soil, they prefer soil that dries out quickly. It’s best to combine half potting soil with other inorganic particles like coarse sand, crushed granite or pumice/perlite to maintain airflow and the right level of moisture.

5. How do you know if your succulents are thriving or dying?

When you see the lower leaves of your succulents dropping, you might think that means it’s starting to die. But that’s not necessarily true! It may be that your succulent is just adjusting to it’s new environment and there’s no need to worry. However, if the topmost leaves are turning brown or starting to fall off, pay attention! It could be an indication that there’s overwatering or there are pests/diseases invading your plant. Try to investigate and adjust the soil, and the container you’re growing it in.

Those are the basics! I hope these questions somehow help as you start your own succulent garden at home. Don’t be afraid to try new things when taking care of plants. Janet Kilburn Phillips once said and I quote, “There are no gardening mistakes, only experiments.” So go on, be brave and just enjoy gardening. You can do it!

By Mel

How to Attract Pollinators to Your Garden

Looking back on my elementary school days, on of my favorite science topics was pollination and pollinators. Today, the first pollinator that comes to mind is bees! While bees are the main insect pollinators, there are several other insects as well as animals that contribute to pollination. This includes butterflies, birds, flies, beetles, moths and even small mammals like bats!

What is pollination and why is it important?

Pollination is the transfer and production of seeds that are necessary for a new generation of plants to be produced. Pollination is beneficial to plants, pollinators and definitely, humans. Pollinators are essential components of our habitat and ecosystem. So, when you take care of your garden, also keep an eye on the pollinators that help your plants bloom. Make your place more inviting to pollinators. Not only you’re keeping your garden healthy and beautiful, you’re also contributing to the environment by keeping the pollinators busy!


So, without further ado, here are my basic ABCs to bring more pollinators to your garden:

A. Add Assorted, Attractive and Aromatic Plants and Flowers

Just like us humans, insects and birds are easily drawn to attractive colors and delightful scents. Play around with brightly colored flowers in your garden and creatively group them based on shade or shapes that can easily catch pollinators’ attention. Be bold and mix a variety of aromatic and pollen-rich flowers that your pollinators can indulge in. Add on some flowering herbs like bee balm, rosemary, lavender and basil. Their flowers bring out fragrance and flavor that bees and butterflies cannot resist. As mush as possible, stick with your local and native flowering plants since these are the plants that your pollinators are most familiar with. Make your garden a paradise for hungry and hardworking pollinators.

B. Build a Bath for Birds, Bees and Butterflies

Provide a bath that can be beneficial to birds, bees, butterflies and other pollinators in your garden. They need water to drink, cool down and clean themselves up. It can simply be a shallow plastic basin or a fancy circular tray with rocks, pebbles and sand so that birds can have better footing. Just make sure you put fresh clean water and it’s well maintained. You can put the bath in a nice protected location near trees or a flowering patch so you can see them gather around on it while you enjoy the rest of your garden. Keep it out of direct sunlight so that it won’t dry out quickly and the water won’t get too hot for the birds and other pollinators to handle.

C. Choose to be Chemical-Free

Pesticides and herbicides are harmful to pollinators and can potentially kill them. Pesticides can also cause human health issues so choose to be chemical-free and avoid other substances that can be toxic to you, your pollinators and other beneficial organisms. In this manner, you can have a healthier garden with abundant pollinators.

D. Dedicate a Dwelling Place

Your pollinators need a home where they can feel secure and comfortable. Dedicate a dwelling place where they can nest. This shelter will serve as a hideout from their predators or just a nook if they simply don’t want to be disturbed. You can make use of rotten or decomposing logs with holes in them for bees, butterflies and other insects. Grass cuttings, small piles of branches and hollow twigs can be used as nesting materials so make sure that you keep some of those too. You can even go as far as making customized nesting boxes where birds can lay their eggs or bats can raise their young. This will give them the feeling that they are welcome to stay, and they can multiply.

E. Enjoy and Expect to Entertain more visitors!

Feel free to continuously edit and enhance your new sanctuary— the main goal here is to keep both your plants and pollinators happy and healthy. Enjoy your garden and expect to see more pollinators every single day! Happy gardening!

-Mel

How To Become A Plant Parent For The First Time

Ever since the worldwide lockdown happened, we’ve all been searching for something productive to do while we’re stuck at home. Many of us have taken on new projects or learned something new, which I think is a great response to a very challenging time. This search for something new has inspired us to pick up hobbies and skill sets like baking or cooking, and some of us have been inspired to do outdoor/indoor gardening.


You may notice your social media feeds have been flooded with posts about plants and your friends showing off plants as their “babies”, hence the birth of the terms: “Plant Mom” or “Plant Parent”. If you’re planning on adopting a “baby plant” soon, here are some plant parenting tips that you might find helpful:

Choose The Right Plant

It’s important that you select the right plant that suits you and your home. Like humans, every plant is unique, and they have different needs & reactions to certain things. There are plants that are very low maintenance and don’t require as much TLC. On the other hand, there are also plants that are sensitive and need a little bit more attention than others. Find out details about the plant you want and see if it matches up with your daily routines and lifestyle. It’s good to do some quick research to get to know your new plants better before you bring them home.

Don’t Get Overexcited

Okay, so there’s a tendency to get overly excited about your new babies and you may water them frequently or check their leaves/stems/flowers all the time. You think you’re spoiling your plant by watering them as much as possible. Guys, please DO NOT do this. Give your plants some space to breathe, get settled into a new environment and water them less than you think you should. Make sure that you follow the watering instructions on your plant. If it loses some leaves, it doesn’t mean it’s dying already. I know it can be overwhelming at first but try to relax and just enjoy your new plant. It’s still adapting to a new home, so expect that there will be few changes in the first few days or weeks.

It’s All About The Location

Plants get their energy from sunlight in order to grow. But not all plants require the same amount of sunlight, so you need to know the right place to put them so they can fully develop. Some plants like it hot and sunny, while others like it cooler or moister. If you see that that your plants are not happy where you place them first, move them around. In time, you will be able to get the right spot.

Talk to Your Plants

You’re a Plant Parent now so build a relationship with your plants! There are research studies that show talking to your plants can help them grow faster. You can even go as far as giving them plant baby names. There’s also a study that shows plants respond more to the sound of a female voice than to the sound of a male voice. So, if you’re a plant mom, that’s bonus points for you!

Ask For Guidance And Tips From Other Plant Parents

Since you’re new to this, it’s okay to seek advice and get parenting tips from your friends that are plant parents too. It’s nice to have people in your life that you can share your gardening experiences with. You can exchange tips and DIY hacks that can serve your plant’s needs. You can also learn a lot from reading gardening blogs and watching plant-related videos online.

Gardening Teaches Patience

It’s not easy to be patient but there’s really nothing else we can do as plant parents but to learn how to wait for our plants to grow in their own sweet time. We are here to nurture them and fulfill their needs. Just be the best plant parent you can be, and I promise, one day it will all be worth it.

-Mel

The Origin of Plant ID Cards

When I first started studying Horticulture, I didn’t know anything about plants. I could see the difference between trees and bushes, but I couldn’t tell you what any given plant was called. As I began to learn plant names and features, the nameless green blobs started to become their own, distinct beings. Suddenly, names and shapes emerged as I walked through my neighborhood. What used to be a “plant” or at best a “bush”, was suddenly a “boxwood” or a “hydrangea”.

I was hooked on horticulture.

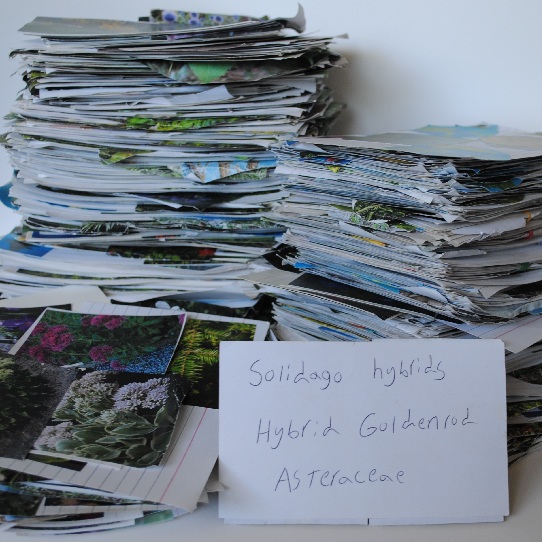
I took my first plant identification course at the local community college. On the first day of class, my professor said, “Every one of you should go home and buy a set of index cards. Put pictures of the plant you want to learn on the lined side, and write the name of the plant on the unlined side.” He knew something I was about to find out; flashcards are the fastest, most effective way to learn plant names.

I was skeptical at first, but I bought the index cards. Suddenly, I was learning and recognizing plants by their common names. Hours of study with the flashcards helped me learn their Latin names too. I must have made over 100 cards just for that class.  I used the cards to quiz myself so I’d do well on our weekly tests. I aced the class, and had a newfound ability to recognize basic neighborhood plants.

But the benefits of using plant ID flashcards didn’t stop there. I pursued my love of horticulture to a university landscape design program. The university curriculum included three plant ID courses, and I knew exactly what to do. I spent hours searching for the perfect pictures, cutting them out, and gluing them to flashcards. Form, leaf, bark, blooms, fruit and buds. I cut the images out, glued them onto cards, and recorded their names. I remember laying around campus with a stack of cards, saying the both the Latin names and the common names out loud over and over again while I looked at the photos to quiz myself for upcoming plant identification exams.

When I learned a plant, I would put it in a stack off to the side, and focus on the rest of the cards I still didn’t have down yet. Being able to recognize a plant on sight and recall its name was extremely rewarding. Doing well on tests and quizzes was even better. I was in my element, and learning dozens of new plants a week. But it became clear to me that some my classmates were totally lost. They were overwhelmed, and had no idea how to organize all of the plant names and features we had to learn. So I started to share the flashcard technique, and many of my peers made the same sudden, exponential progress I was making!

Years later, I moved across the country from Virginia to California to start my own landscaping business.  I had all of my plant knowledge, enthusiasm for the field, and a business plan ready, but once I got there, I was stuck. I couldn’t believe how many plants grew in Northern California that I had never even seen before. Sure, I knew there would be new plants to learn. But the sheer diversity and range was astounding. What was an Agapanthus, Callistemon, or Cordyline? If I didn’t figure out how to identify the Agave, Aloe and cacti everyone had growing in their front yards, and fast, I clearly wasn’t going to make it in this new market.

I took a trip to the local wholesale plant nursery with a notebook, and walked up and down the aisles recording the names of all the plants I didn’t know. It was a formidable list, but I was an old hand at the flashcard method by then. I took a few days to make a whole new deck of California-specific plant ID cards. And sure enough, I was able to learn them quickly. My business was up and running in no time.

In my personal experience, this is hands down the easiest and best way to learn plants and remember their names.  If you’re a student looking to quiz yourself for an upcoming test, Plant ID Flashcards are for you. If you’re a master gardener who wants to learn exciting new plants to feature in your yard, Plant ID Flashcards are for you. If you’re a landscaper or a landscape designer who wants to win new clients and push your professional career to the next level, Plant ID Flashcards are for you. Finally, if you just want to learn more about the world around you, and be able to name the plants you see in your neighborhood, Plant ID Flashcards are for you!

To this day, when I walk around outside with friends, they will sometimes point to a plant or a tree they don’t know, and ask me, “what’s that?” Thanks to my practice with plant identification cards, I can confidently shout out, “Quercus phellos – Willow Oak – Fagaceae family”.

-Eli